Enabling Outbound Calls for Your AI Receptionist
Last Updated: January 31, 2025

Your AI receptionist does more than just handle inbound calls and chat messages—it can also make outbound calls for your business. While this feature is not automatically enabled on every Local Business Pro account, you can easily request access by following these simple steps.
Requesting Access to Outbound Calling
- Log in to your Local Business Pro account.
- Navigate to ‘Connect’ on the left sidebar and click ‘Outbound Triggers.’
- If outbound calling is not yet enabled on your account, you will see a message prompting you to apply for access.

4. Click ‘Apply for Outbound’ to be redirected to the Outbound Call Request Form.
5. Fill out the form to request access to outbound calling.
Processing Time & Requirements:
- Approval typically takes a few business days.
- You may be required to submit additional documentation as part of the review process.
- Local Business Pro reserves the right to decline requests that do not comply with community standards.
Once Your Application is Approved
After your request is approved and outbound calling is enabled, follow these steps to set up outbound triggers:
- Go to
Connect > Outbound Triggers.You should now see the Outbound Triggers setup enabled.
- Go to
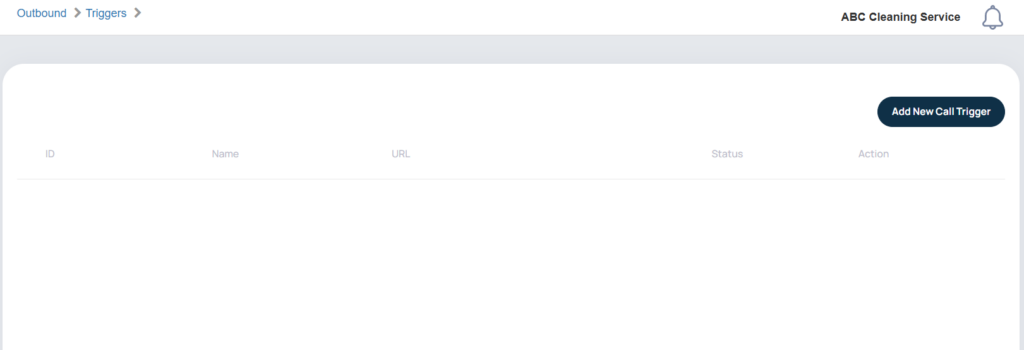
2. Click ‘Add New Call Trigger.’
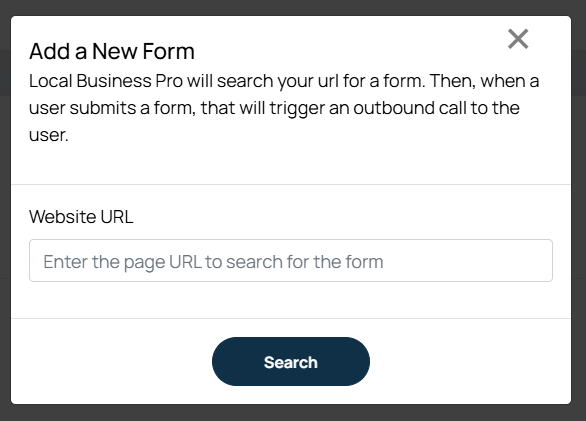
3. Enter the URL of the form that will trigger the outbound call. Click ‘Search.’
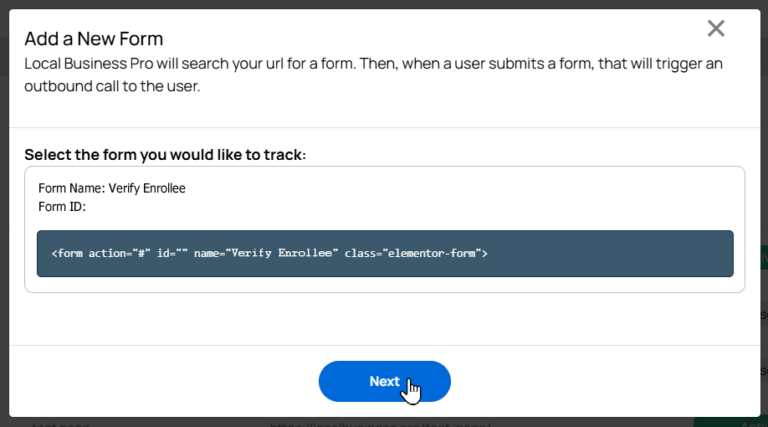
4. Select the appropriate form from the list of detected forms and click ‘Next.’
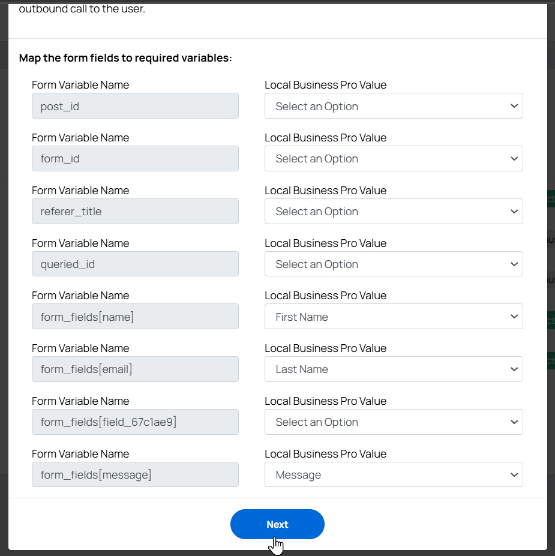
5. Map the form fields to the required variables needed for the AI to initiate outbound calls. Click ‘Next.’
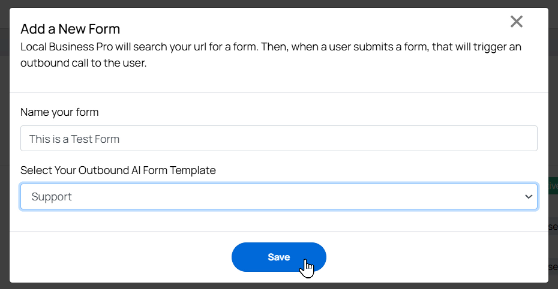
6. Assign a name to your form and select an Outbound AI Form Template to use. Click ‘Save.’
Creating and Understanding Outbound Templates
The Outbound AI Form Template defines the AI’s script and call flow. It includes:
- The Template Name that clearly describes what the outbound template is for.
- The initial message your AI receptionist will say when the recipient answers.
- Business-specific prompts that the AI will follow throughout the conversation, ensuring compliance with best practices and policies.
For example, the AI might ask why the recipient signed up, confirm a support request, or provide relevant business information. The call flow can be customized based on the variables collected from the form that triggered the outbound call. For instance, handling a support request will differ from managing an enrollment inquiry.
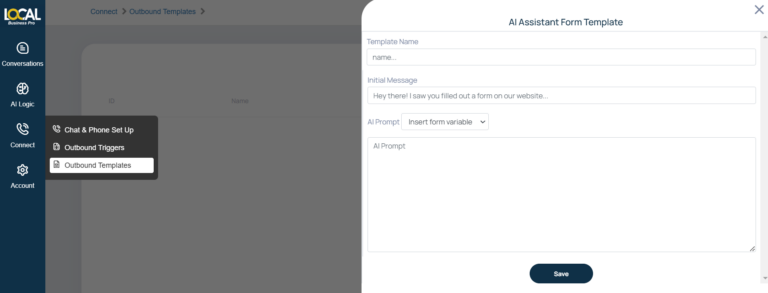
If you need help setting up an Outbound Form Template, reach out to our Support Team.
📌 Additional Resources: How to Make an Outbound Call via Webhook
Finalizing Outbound Call Setup
Once your Outbound Forms, Triggers, and Templates are set up, your AI receptionist will start making outbound calls automatically.
Tracking Outbound Conversations
- Outbound call logs can be viewed under:
Conversations > Outbound Conversations. - Similar to inbound calls, outbound conversations can be filtered by date.
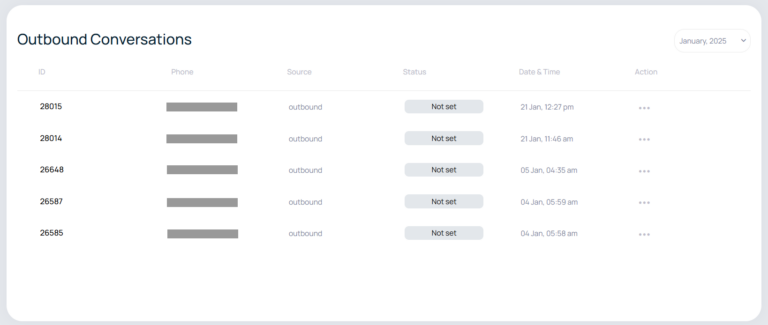
- Each call has a unique ID and can be categorized by recipient type (e.g., Current Customer, Lead, Unqualified).
- You may also ‘Add a Note‘ to provide more details about the specific outbound conversation.
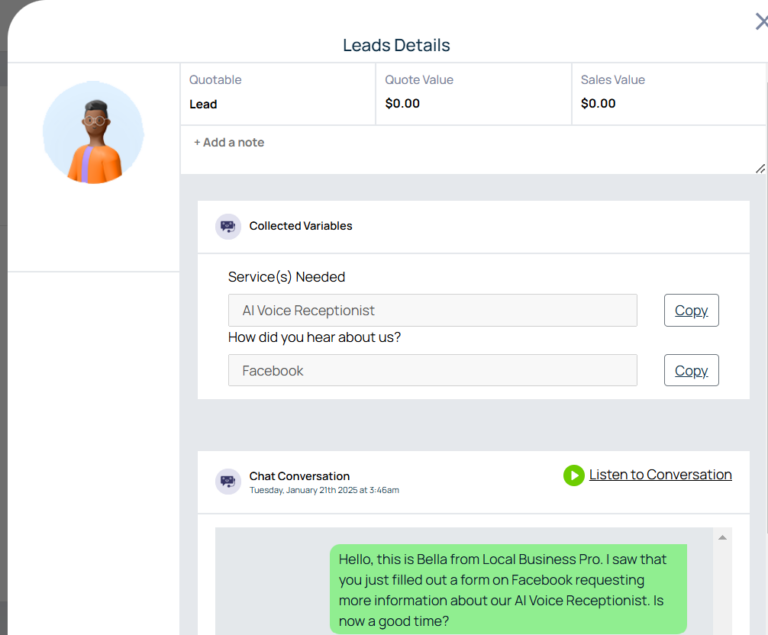
- Click on a conversation to view:
- Collected Variables
- Full Chat Transcription
- Audio Recording Link
